Showing posts with label recipe. Show all posts

Wednesday, December 10, 2014

Easy Spinach Berry Salad

Pin It Now!
     Hi all! I hope everyone's week is going well. It's so amazing to me how fast this time of year flies by. We all get so busy, and I'm not sure about you but sometimes I forget what day it is. I feel like this is also the time of year where during the week we just "grab dinner somewhere". We are trying very hard to break that habit in our home as you all know. So when my girlfriend Mallory (you know her better as Charming in Charlotte) brought this DELICIOUS Spinach Berry Salad over to our house I knew it needed to be shared!

     I'm usually not a fan of the "more creative" salads, but this by far the best spinach salad I've ever had. It can be your main course by adding some tenderloin or grilled chicken. You can also use it as an appetizer or side by simply leaving the meat off.

     Have picky eaters coming to your house for dinner? This salad will fit the bill. Leaving the bleu cheese off will fit the bill for the paleo diets and dairy free guests. Leaving the meat and cheese off will be perfect for your vegan and vegetarian friends. It makes being accommodating to your guests so easy. (I hope you can read my excitement oozing off of the page!!)


Spinach Berry Salad
what you need:
1 bag baby spinach 
1pint Blueberries
1c strawberries, cut into quarters
1c grapes, cut into halves 
1/2c almond slices
1/4c raisins 
1/2c bleu cheese crumbles
balsamic dressing, to taste 

Optional toppings:
grilled chicken (blackened)
beef tenderloin
prime rib

What to do:
   1. Put ingredients in order into a large salad bowl. Toss before serving. 
This will keep in the fridge undressed for 3-4 days. 


ENJOY!! 

Sunday, December 7, 2014

Easy Mini Cheesecakes

Pin It Now!
   
      Are you looking for a sweet treat that is easy to make? I love these Mini Cheesecakes. You can make them with any fruit topping or just eat them on their own. They were a huge hit at our Thanksgiving dinner this year. We also enjoyed them as a little dessert on the days following Thanksgiving.


     These are perfect for wrapping up as a sweet holiday treat to give to a neighbor or friend! They are gluten free and vegetarian. They are also only two bites so they won't pack on the holiday pounds if you can eat just a couple. (Good Luck with that)


     You can also make these with a fruit topping. I think berries work best. If you are feeling fancy you can go as far to make a marbled look, or just cut fresh berries to set on top right before you serve! I have not perfected a marbled look but for my more crafty readers I'm sure you can show me how.


   The big lesson I have learned with making cheesecake is your cream cheese has to be at room temperature and so do your eggs. If you use cold cream cheese and eggs your batter with be thick,  clumpy and hard to work with. You want your beaten batter to be smooth and creamy, almost like a cheesy cloud.


Mini Cheesecakes
what you need:
2 packages (8oz) plain cream cheese, room temp
2 eggs, room temp
3/4c coconut palm sugar
(you can also use organic cane sugar)
1 1/4tsp vanilla extract
pinch of salt 

What to do:
1. preheat oven to 350 and line a mini cupcake pan 
2. put all ingredients in a medium mixing bowl 
3. using a hand mixer, beat ingredients together on medium speed until mixture is smooth and creamy. (3-4 minutes)
make sure there are no lumps and that batter appears smooth and light
4. fill mini cupcake pan with batter, fill each cupcake all of the way 
5. bake on 350 for 15 minutes, cupcakes should be slightly darker in color and look like little pillows
6. take out of the oven and immediately place on a cooling rack. It is very normal for these to shrink, that's why you fill them all the way before baking. 

Enjoy!!!


Saturday, November 22, 2014

Easy Delicious Chicken & Corn Chowder

Pin It Now!
     Ahh.... I'm so excited the weekend is here! I do work some Saturdays but not this Saturday. So my boys are off to swimming class and I get to enjoy my morning "off". Which actually means I'm laying in bed with a big cup of coffee to tell you all about this delicious Chicken & Corn Chowder I made for us this week.

     It's been very cold out these days in Charlotte so we have all been craving warm food. I'm not ready for something super hearty right now so this chowder is a happy medium. It's warm and filling but still light enough for lunch. 

     This also freezes very well. I went ahead and made a big batch and frozen half of it. I love to have soups on hand for busy days that I don't have time to make dinner. For whatever reason that night seems to always be Thursday night. 


     This soup seems to suit all pallets in my household. It has a little sweetness plus a kick if you add the jalapeño. The chicken adds extra texture, and the slight tastes of bacon is what will make you really love it. Is your mouth watering yet? Give this a try this weekend, your house will smell amazing and you family will have full tummies. 


What you need:
1lb cooked chicken shredded 
6 bacon strips 
1/2 white onion diced
3 celery stalks sliced
3 cloves garlic pressed
2Tbsp butter
2Tbsp flour
1qt low sodium chicken broth
1 1/2c whole milk
1 Jalapeño "gutted" and diced
1pkg frozen sweet corn
1pkg frozen peas and carrots
1/2 red pepper diced
pinch of sea salt
ground pepper to taste

What to do:
1. heat your dutch oven over medium heat and add bacon slices. Cook bacon until crispy and set aside, leave grease in oven. 
2. Add butter into dutch oven, once melted add garlic onion and celery. Cook until softened. slowly whisk in flour. A nice rue should form. If it's a little clumpy don't worry. 
3. Whisk in chicken broth and milk. Bring to a boil
4. Once boiling cover and turn heat to low. Let simmer for 10 min. Your broth should start to thicken. 
5. Crumble bacon you set aside and add to broth, also add salt and pepper
6. Add jalapeño, corn, peas and carrots, chicken and red pepper. Continue to cook on low for 25 minutes. Stir occasionally and keep covered. 
7. Serve and enjoy!!!! Top with additional jalapeño if you like some extra kick. 

     I used all organic ingredients for this recipe. I recommend that you do the same. However always remember cooking fresh food is always best. If you decide not to use organic know you are still doing what's best for you family buy leaving soup in the can at the store! 


     I hope you all have an awesome weekend. We will be busy prepping for the large Thanksgiving that we are hosting. I will try to keep you all updated on what's going on for our second Real Food holiday feast at the Ridberg house. Make sure you follow me on Instagram @theeasyappetite to keep up with our daily cooking. 

Xo, 


Saturday, November 15, 2014

The Best Easy Blueberry Muffins

Pin It Now!
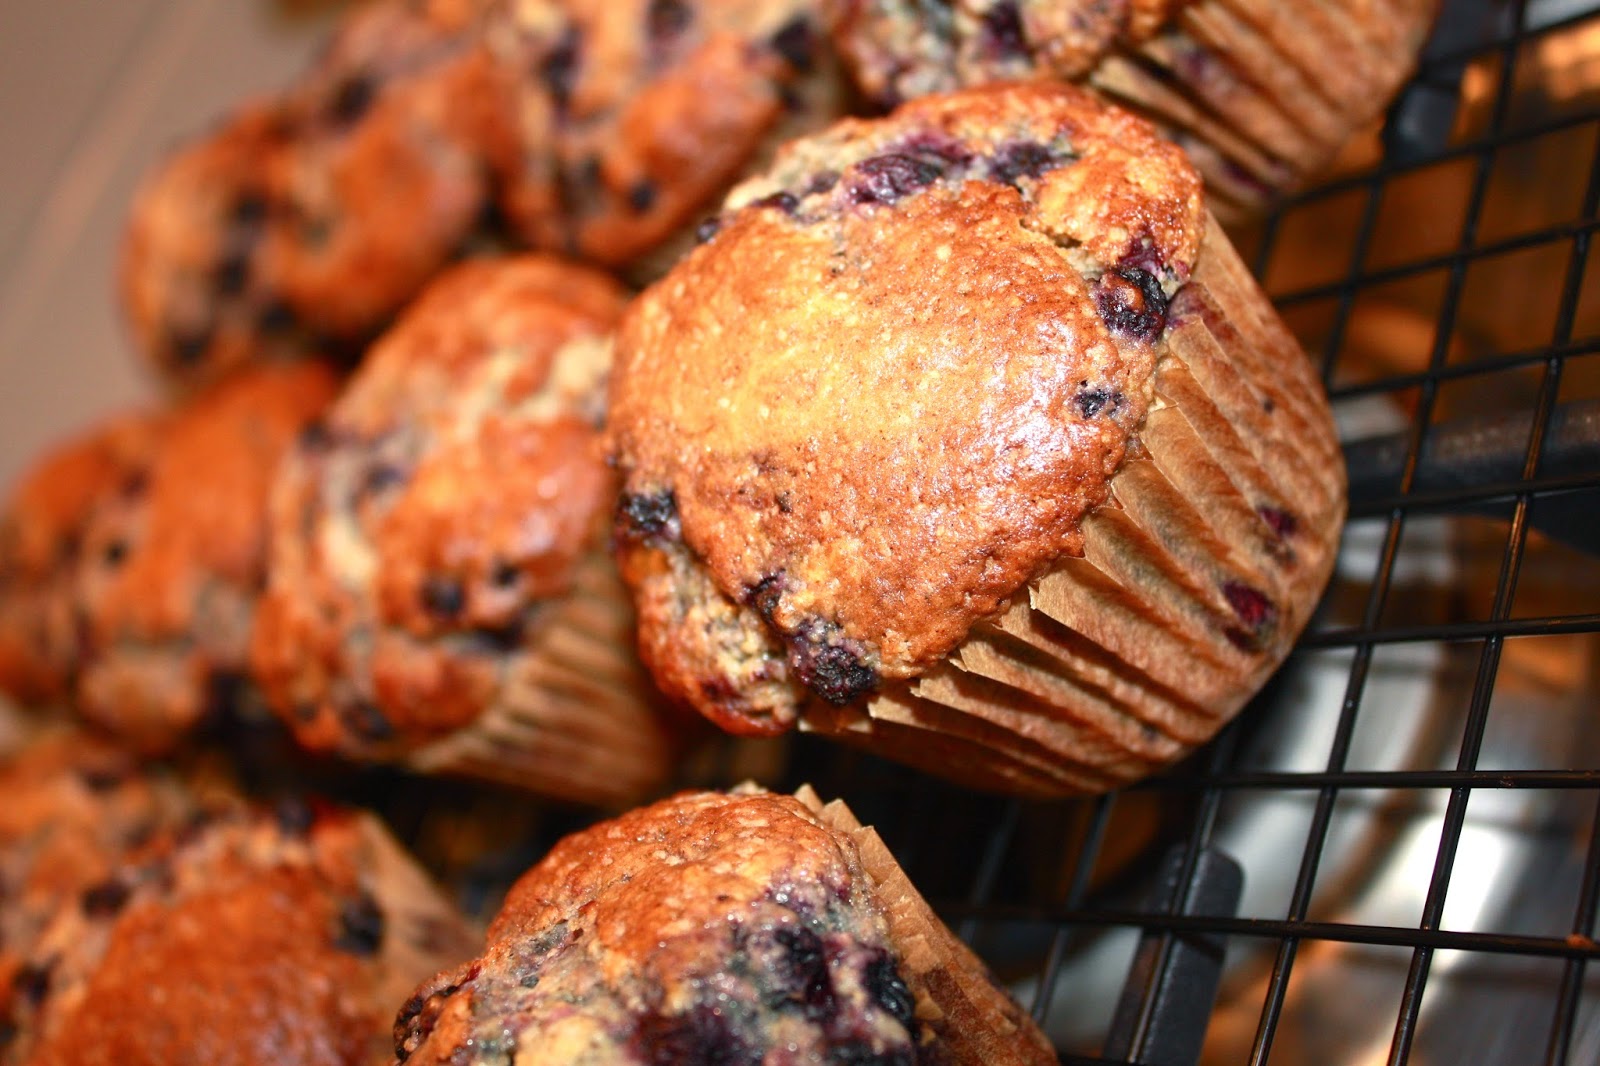
     Ahhh, Blueberry Muffins. They truly pull on my heartstrings, and are a favorite from my childhood. I remember making them with my Grandmother when I was young. It was actually one of the few things that she would make out of a box. So trying to come up with something not from a box  that can recreate these memories has not been easy. Then today I did it! I hit the jackpot of homemade Blueberry Muffins.


     These muffins are extremely moist, and full of the taste of blueberries. My grandmother told me you always have to buy the box with "wild blueberries", and don't ever drain the juice. So while poking around Whole Foods one day I found bags of frozen organic wild blueberries. Since these don't come in juice I just decided to add in the whole bag! 


     What you need:
2c whole wheat flour
2/3c coconut palm  sugar 
(you can use cane sugar or honey)
3tsp baking powder
1/2tsp cinnamon
1/2tsp sea salt
1/2c whole milk
(you can also use almond or hemp milk)
1/2stick butter (melted)
2 eggs room temp
1tsp vanilla 
1 1/2-2 cups of fresh or frozen blueberries
muffin pan, lined 
preheated oven to 400

What to do:
1. Sift together flour, sugar, baking powder, cinnamon and salt. Whisk lightly to blend. Set bowl aside
2. In another mixing bowl combine milk, butter, eggs and vanilla. Whisk together until blended
3. Pour your wet ingredients into the dry ingredient bowl and mix just until blended. Over mixing will cause muffins to loose their fluffy texture
4. fold in blueberries
5. spoon mixture into muffin pan and bake for 18-22 minutes until a toothpick will come out clean. 
6. Serve and enjoy!! 

Good luck keeping these around the house for very long!

Wednesday, October 29, 2014

Cheesebuger or Hamburger Wraps

Pin It Now!

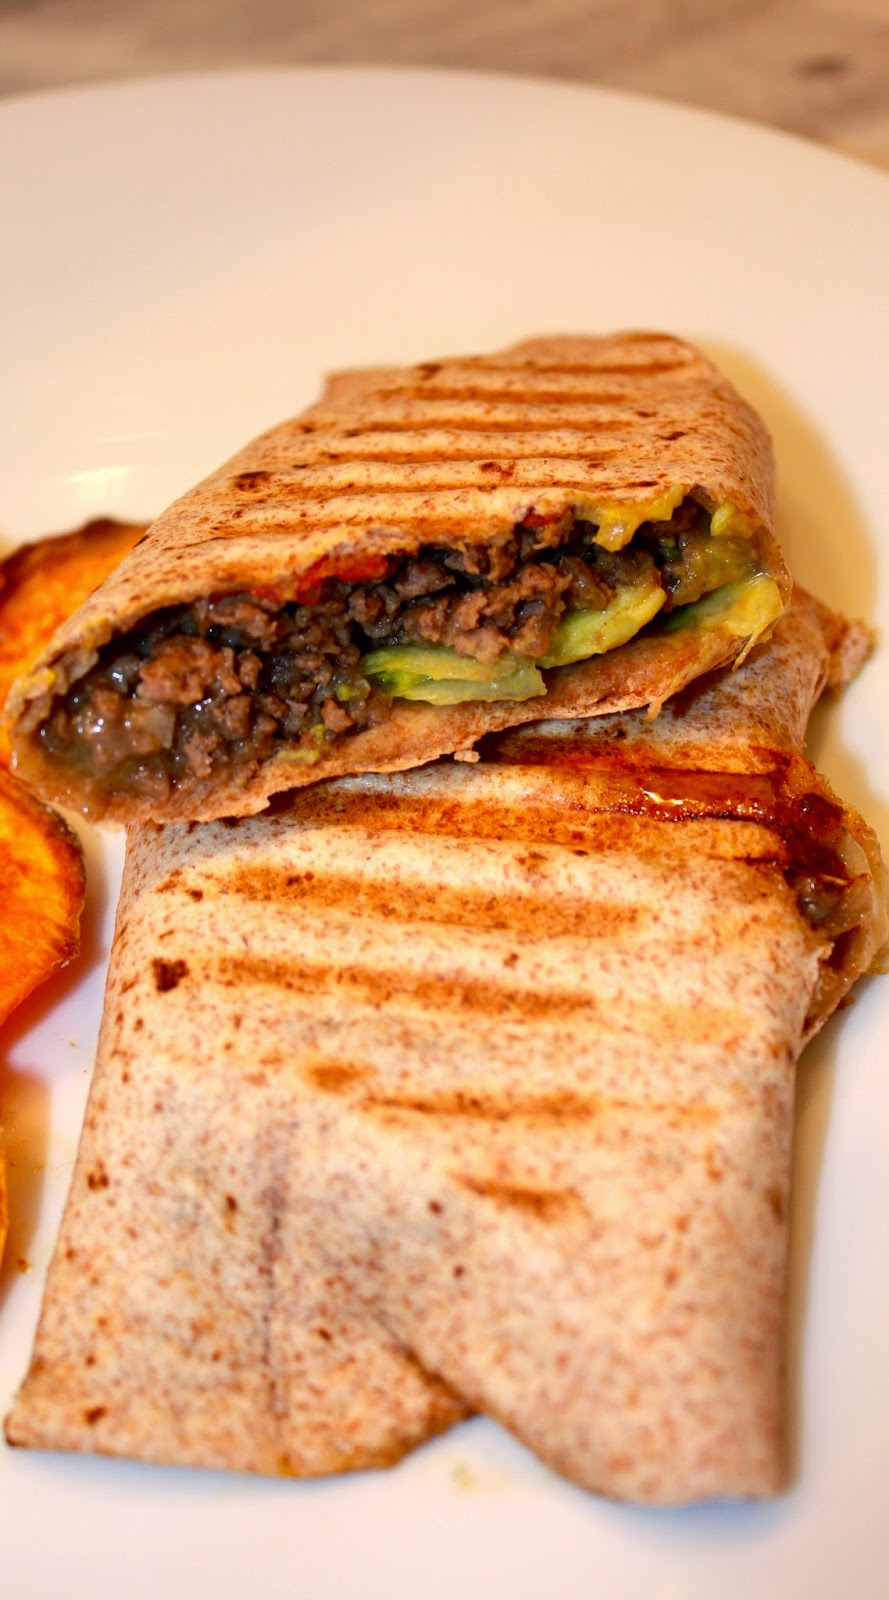
     One of my old bad habits was a place called Showmars. They sell this cheeseburger pita, and I used to love it. Now I would prefer to stay away from fast food, but I don't see any reason why I can't recreate an old favorite. That way I know I'm using organic ingredients, high quality meat and no gross oils and chemicals fast food places sometimes add. These were so easy to make and every family member can customize what they would like in their wrap. From start to meal time this took about 30 minutes. I even had time to make some yummy sweet potato chips.


Burger Wraps/Panini
what you need:
1lb ground beef
1/2 a white onion (diced)
2 garlic cloves (diced) 
2Tbsp worcestershire sauce
black pepper
whole wheat tortillas
optional toppings: lettuce, tomato, mushrooms, avocado, cheese, mustard, ketchup, green chilies

what to do:
1. dice onion and garlic with your Oxo Food Chopper 
2. In a large skillet add beef, onion, garlic, worcestershire sauce, and a dash of pepper. Cook over medium heat until meat is brown. 
3. Add meat and whatever toppings you'd like to your whole wheat tortilla. Wrap and tuck ends
4. I HIGHLY recommend preheating a panini maker and cooking your wrapped burger. It is so tasty and delicious. Enjoy!!


I hope everyone is having an awesome week so far! 


Wednesday, October 22, 2014

7 Tips for Helping You Eat Healthier

Pin It Now!
     Let me start by saying, I'm exhausted most of the time. Having a wonderful little 18 month old to chase after, being pregnant, having a husband that travels, working a full schedule & running my own business. Most days I feel like falling over!! I love my life, I'm very happy and grateful for everything I have but I'm really tired. When I decided I would learn how to cook it didn't take very long to figure out it is a lot of work. Really it is a commitment, and sometimes we slip but are very quick to get back on track. Honestly staying on top of things for Bennett isn't hard, where I slip is when it comes to Chris and I. So this is my list of tips that I use to help me eat healthier. Hopefully these will be helpful to you too.

1. Wash and cut your fruits and veggies first thing- When I get home from the store, I wash and cut my berries and veggies when I get home. I lay fruit out to dry and then store in tupperware containers. Pineapple stores really nicely too.  I usually soak carrots in water in tupperware. All other veggies get their own tupperware containers. If you plan on roasting any veggies go ahead and season them as well. I find these will keep for 3-5 days. This only takes about 30 minutes and seems like it saves hours! 

2. Keeping an Apple and Water with me-  This sounds so simple and well, it is. When I get hungry I get cranky! This is when I will just swing by somewhere to get a snack. It's hardly ever healthy, and usually is more than a snack.  I also find that most of us stay dehydrated, so that is where the water comes in. When we are dehydrated we can actually feel hungry and are more likely to crave sugar and fattening junk food. So the apple will raise my blood sugar and keeps me full enough until I get home to make something. Drinking a bottle of water also helps fill me up too. 

3. Skipping Most Aisles in the Store-  You can also say, shop the perimeter of your grocery store. We do buy a few things out of the aisles, but we try and stick to the rule of no more than 5 ingredients, I must know what they all are, and be able to pronounce them. Produce is usually what we buy the most of, either fresh or frozen. 

4. Cooking and Packing Lunch Ahead of Time- Usually on Sunday night we will grill a couple of chicken breast, or make a tuna salad for my lunchtime protein. You can also boil and peel a few  eggs. That way most nights I make a sandwich or salad, toss in a yogurt, and add a few sliced fruits and veggies. Each lunch usually takes less than 10 minutes at night while I clean up dinner and then I can just grab it out of the fridge and go. Easy Peasy!! 

5. STOP Counting carbs, fat, sugars, proteins and all the other things your count!- Pay attention to the ingredients that are in what you buy. Why are we eating things that aren't food? Kind of hard to ignore once you really start to think about how odd it is we eat more chemicals than real food! Make fresh food for you and your family, use fresh whole ingredients. When you are using real food to cook with all the nutrition will balance out! To learn more on this topic check out these movies Forks over Knives, and Fed Up. Also try reading In Defense of Food. 

6. Allow yourself a night out- It's okay to eat out, we do and everyone needs to. Just allow yourself to be picky and ask lots of questions. When we eat out it is to give Chris and I a break from cooking and planning not to fill out of grease and sugar. Remember that ordering off the kids meal for your kids is usually going to result in them eating junk. Put together a plate of sides for them. 

7. Find Joy and Peace In Cooking- How silly does that sound? I was so overwhelmed and stressed out by cooking before nothing ever really got accomplished. Now that I have started planning, and researching I have really started to like cooking. Grating cheese is somehow a place I find peace?!? I still have a lot more learning and researching to do, but this is one of many ways I provide for myself and my family. It is a really good feeling. I remember how at home my grandmother always seemed to be in the kitchen and I hope that one day I will be that way. I still have my days where I am more like a fish out of water. 

     I hope you are all having a wonderful week! Please let us know any tips you have found helpful for eating healthy.

Monday, October 20, 2014

Sweet Potato Cookie

Pin It Now!
     These are such a perfect snack, soft and simple for your little one but tasty enough for everyone! I feel like most of the recipes I find for toddlers create really bland food. Well I'm over that, these are very flavorful.  The best part is you can eat as many cookies as you'd like, there is no added sugar!!

   
Sweet Potato Cookies
what you need:
3c almond flour
1can organic pureed sweet potato or 1 3/4c fresh mashed sweet potato
1tbsp cinnamon
1/2tsp nutmeg
1/2tsp ginger
1/4tsp salt
3tsp baking powder
3tbsp water
What to do:

1. preheat oven to 350
2. Combine all ingredients in a large mixing bowl, until smooth. If mixture seems to dry add a little more water
3. Scoop 1tsp of mixture at a time onto a parchment paper lined baking sheet. This should give you about 1-1&1/2" cookies
4. Bake on 350 for 7 min, flip and press each cookie down lightly (don't make them flat). cook an additional 7 min or until a toothpick will come out clean. 
5. While still warm you can sprinkle with a little extra cinnamon. Serve and enjoy!! 

     After the cookies cool completely, I usually store them in a Ziploc bag. I'm also pretty sure they would freeze well. For those of you that are not dairy free, these would be very tasty topped with cream cheese. 


Monday, October 13, 2014

Homemade Apple Pie Larabars

Pin It Now!
     I was so excited when I was in Earth Fare the other day and this idea came to me. We were looking at all the dried fruit and when I saw the apples I knew we had to give this a try. They are AMAZING, and a great fit for the season! They are made from 5 simple ingredients, and only take about 20 minutes total.
Apple Pie Snack Bars
what you need:
2/3lb dried dates
1/3lb dried apples (unsweetened, without peel)
 finely chopped walnuts
3tsp cinnamon
1/2tsp nutmeg

What to do:
1. make sure your dates are pitted, if they aren't go ahead and pull them apart to get the pits out (super easy!) 
2. Put dates in the food processor and process until smooth and pasty or a ball forms in your processor, set in a mixing bowl
3. run apples thru the food processor, until they are in small pieces. Put into mixing bowl with the dates
4. chop walnuts into fine pieces (I use my Mini Chopper for nuts). Put into the mixing bowl with the dates and apples
5. add cinnamon and nutmeg into your mixing bowl
6. using your hands, mix all the ingredients together really well and form it into a ball.
7. place it between two sheets of wax paper, and using a rolling pin flatten your mixture out until it's about 1/2" thick. place in the fridge wrapped in wax paper
8. Once chilled use a pizza cutter to slice and serve. This keeps really well for up to 2 weeks. (good luck keeping them around that long!!)

I hope everyone has a great week, and these will make snack time easier! 

Sunday, October 12, 2014

The Best Easy Whole Wheat Pancakes

Pin It Now!
 Let me just say I am a total sucker for anything pancake! The funny part is so is Bennett. The hubs he could take them or leave them, but not the two of us. He may not look anything like me but I think he got my taste buds. So after reading what is actually in my box of Bisquick, I decided it might be fun to try and make something of my own.

     As it turns out pancakes are really easy to make. It was about 8 minutes in prep time, and that includes entertaining an 18 month old. While cooking them in a skillet I usually make an omelet or bacon and eggs. I just keep the pancakes warm but sticking them on a baking sheet in the oven set on 250. I also use that time to slice fruit to serve on top of my pancake stack. 


     If your like me and you enjoy batch cooking, these pancakes freeze very well. I usually heat them up in the toaster or microwave. That way on busy mornings Bennett can have homemade pancakes, fresh fruit and some plain goat yogurt. (I have plain regular yogurt) I hate stressing about what most call "the most important meal of the day", so having something prepared ahead of time takes that stress away. 

Whole Wheat Pancakes 
what you need: 
1 1/2c whole wheat flour
1tsp baking powder
1/2tsp baking soda
1/2tsp salt
1/2tsp cinnamon (optional) 
1 1/2c whole milk
2 TBSP butter, melts
1 egg
1 1/2tsp vanilla
2TBSP honey or coconut palm sugar
GREAT OPTIONAL ADD-INS:  fresh berries (chopped if using strawberries), chopped walnuts, flax seeds, bananas, chocolate chips. Use up to 1/2c total of  add-ins. Be creative!! 
What to do: 
 1. whisk flour, baking powder, baking soda, salt and cinnamon together in a medium mixing bowl. Set aside
 2. Win another bowl whisk together milk, honey, butter, vanilla & egg. 
 3. Dig a well in your dry ingredient bowl. Pour your wet ingredients into the well and mix together with a fork. It is very important not to over mix. There should still be small lumps in your batter. If it seems to thick just add 1TBSP of milk at a time to thin out. 

4. preheat a medium size skillet and melt a slice of butter in it. 
5. pour batter onto hot skillet, creating a 4-6" circle ( I use a small ladle to pour into skillet) 
6. cook until middle starts to bubble and edges start to brown 
7. Flip your pancake, and cook until golden brown
8. Serve hot with, butter syrup or fresh fruit. ENJOY! 


     I hope that everyone has had a wonderful weekend! We have been busy catching up from being gone. There has been lots of laundry, football, and cooking going on over here! 


Allergy info: I have used almond milk and goat's milk to replace the whole milk.  I've used earth best vegan buttery spread to replace the butter with this recipe and it has worked very well. 


Friday, October 3, 2014

Easy Pumpkin Walnut Bread

Pin It Now!    
     It has taken me a few years but I have really jumped on the pumpkin wagon. Fall and spring are my favorite seasons so really it only makes sense to love fall produce too. If you follow me on instagram (@theeasyappetite) then  you know we have gotten into pumpkin already this year. So I decided to try my hand at pumpkin bread. The first attempt was a fail (pregnancy brain allowed me to forget my seasoning, really??), but the second was a total success. 


     I decided to bake this bread in mini loafs, I didn't do this for any other reason than I think they are really cute! They also make great little gifts if you are going to someone's house. Another great thing about this recipe is it freezes really well. I freeze it sliced but you can also freeze it whole. I go ahead and slice it so B gets a piece with breakfast or lunch every day, I just microwave it wrapped in a paper towel for about 30 seconds and it comes out warm and moist. If you freeze the whole loaf to defrost just put it in the refrigerator the night before serving. 
sliced and ready to freeze! I use a wax paper lined
baking sheet and freeze. Once frozen I store in a
Ziplock bag.
     One last thing I should add about this recipe is while baking your house will smell AMAZING! I think that might be my favorite part about baked goods that have cinnamon in them. The smell that fills the downstairs of my house is so warm and inviting. Like we should all snuggle on the sofa with hot apple cider and a slice of pumpkin bread. 

Easy Pumpkin Walnut Bread
what you need:
2 cans pumpkin puree (not pumpkin pie filling)
1/2c finely chopped walnuts
1 3/4c Whole Wheat Flour
1tsp Baking soda
2tsp Baking Powder
1 1/2 TBSP cinnamon
3/4tsp nutmeg
3/4tsp cloves
1/4tsp salt
1 stick butter (softened)
1/2c honey
1 egg
1tsp vanilla
2 loaf pans
preheat 350

what to do:
1. In a large mixing bowl add flour, baking soda, baking powder, cinnamon, nutmeg, cloves and salt. Whisk together

2. In a separate mixing bowl beat together butter and honey until creamy. Add egg and vanilla and continue to beat on low until creamy and smooth. 

3. Add creamy mixture to dry ingredients and stir until blended. (don't over stir if it's on the dry side that's fine bc you still have to add the pumpkin and walnuts)

4. fold in pumpkin until smooth and blended

5. fold in walnuts

6. pour into greased loaf pan and bake on 350 for 50-60 min. 

     So add pumpkin and spices to your shopping list this week! I promise this recipe will not let you down. 


Monday, September 29, 2014

Fall Apple Muffins

Pin It Now!
     Hi everyone, I hope that you all had a wonderful weekend! The hubby and I got to escape to Asheville this weekend. (Thanks dad & Sheila!!) It was a wonderful time away that was very needed. The weather was perfect to walk around and be outside, so we got to visit lots of awesome local whole food restaurants. Who doesn't love a weekend like that? I will say the cooler weather around here has put me in the mood for some fall food. So when I got home yesterday I whipped up some Apple Muffins, just in time for Bennett's dessert.

     These are pretty easy to make, and VERY delicious. I like to use a few bigger pieces of apple so that the muffins will have a little crunch. You could also add in a few walnuts or pecans if you are looking for a real crunch.

     I have never been able to decide the perfect time of day to eat these. They go wonderful as a side dish for breakfast, a quick afternoon snack or a healthy dessert for dinnertime. I do not suggest leaving them out on your counter after they cool. If you are anything like me they will be gone the first day, since every time I walk by one lands in my hand!!

Apple Muffins
what you need:
2 small apples, diced (honey crisp if available)
1 3/4c whole wheat flour
1tsp baking soda
1tsp baking powder
1 1/2tsp cinnamon
1/2tsp nutmeg
1 stick butter, melted
1/2c honey or maple syrup
2 eggs
1 1/2tsp vanilla
1/3c sour cream
preheat oven to 350
cupcake pan, lined
*use organic when possible 

What to do: 
1. In a large mixing bowl add flour, baking soda, baking powder, cinnamon & nutmeg. Whisk together and set aside. 

2. In a separate bowl beat butter and honey together until creamy. (about 1 min)

3. Add eggs, vanilla & sour cream. Beat well until mixture is smooth

4. Add wet ingredients into bowl that has your dry ingredients. Whisk together

5. Fold in apple chunks (coat in a small amount of flour so they won't sink to the bottom of your pan) 

6.  Fill cupcake pan with batter. Fill each muffin about 3/4 full. Bake 21-24 min on 350, or until a toothpick comes out clean. 

I hope you are all enjoying a bit of cooler weather and some yummy fall produce! Please check back later this week for my pumpkin bread recipe!! (If you can't tell this baby in my belly is craving muffins, bread and breakfast) 


ps. please remember to share our recipes on Facebook or pin them so you can have them later. ~xo